Showing posts with label recipes. Show all posts

Wednesday, July 17, 2013

Freeze Your Own Acai Juice For Smoothies & Acai Bowls

You may know that I've been eating gluten free for almost seven months now. I've found that the hardest meal of the day to eat gluten free is breakfast. Most of it involves bread of some form- toast, bagel, cereal, muffin, donut, pancake, waffle... you get the idea. I WISH I liked eggs, but I really have to force them down with bacon or sausage in the same bite. I recently got introduced to acai bowls, and I LOVE them! The problem is, all of the recipes I've found involve frozen acai smoothie packs. I went on a quest to find them, and the closest place I found to my home is 45 minutes away at a Whole Foods. The other thing is...they're expensive. It was $6.99 for FOUR little frozen packets.
I found fresh acai juice in my local grocery store (Savemart for locals), and tried making bowls with that. The problem was, they were really runny, really quickly because there was so much liquid. The other thing to think about is this large bottle of juice is $6.99, but has to be used within 7 days of opening it. Then one day I had a brainstorm! What if I froze the juice in ice cube trays, then dumped the cubes into a freezer bag to pull out when I needed them? Hello, genius! 
I'm happy to say, it worked!! One large bottle is enough to make 3 ice cube trays. I estimate that one big bottle should end up making about 10 smoothies or acai bowls, for the same price you would get FOUR at the store. I thought I'd give you the recipe I've ended up with after many trials and errors.

 First up, cut your fruit that will top it. It can be anything you want- strawberries, raspberries, blueberries, blackberries, nectarines, bananas, whatever you'd like. You want to cut it first so that you are ready to assemble your bowl when the smoothie part is ready.
The toppings I use are my gluten free granola, sliced raw almonds, and hemp hearts. Hemp hearts sound weird, but they're really good for you, and when you are eating something with a lot of flavor, you really can't taste them.
 In your blender (just bought a Ninja last week and I LOVE it!), drop in 3-4 acai frozen cubes, half of a sliced frozen banana, 1/3 cup frozen raspberries, 1/3 cup frozen blueberries, 1 cup organic apple juice. I pulse it a few times, and then blend until smooth.
 This recipe makes 2 snack size bowls, or one BIG (meal size) bowl. When it's done it should look like this, see how it has almost a thick ice cream consistency? Yep, not runny anymore!
 Now is the fun part, just top it with your goodies! I spill on some granola, hemp hearts, and almonds.
 Then I top with the fresh fruit! This is SO super yummy, and acai is REALLY good for you! If I eat this, I am full for hours.
Enjoy! Let me know if you try freezing your own acai juice!

Saturday, May 18, 2013

Gluten Free Salted Caramel Granola

I wanted to share with you my latest gluten free go-to. Smoothies are great, but eventually you can get burned out on them every day. I looked up a few different granola recipes, but I didn't have all of the ingredients on hand, and I didn't want to go to the store. So even better, this is the lazy gal's homemade granola. 
 Granola is so easy to make, and really satisfying.
 Mix:
 1 Tbsp. brown sugar
1 Tbsp. honey (local is best)
2 egg whites
pinch of salt
1 1/2 tsp. vanilla

Mix it well with a whisk to break up the brown sugar.

Add 2 cups of gluten free old fashioned oats and about 1/2 cup chopped almonds. Stir well until all of the oats are coated.

Here's the good part... I heated up my Fleur De Sel Caramel Sauce in the microwave (because I store it in the fridge) for about 30 seconds. I wanted it to be easy to mix into the oats. This brand is gluten free and from Trader Joe's. Add 1 Tbsp. (more if you like) and stir it all up again.
 I line my baking sheet with parchment or a baking liner that's nonstick. Spread it out as much as you can.  Bake at 325 for 35 minutes. Check it at about 30 minutes, as all ovens are different. You want it to get beautifully browned and toasted. Pull it out of the oven and let it cool completely.
 This is one of my favorite ways to eat it... as cereal with Vanilla Almond Milk, topped with berries.
Store it in an airtight container. I like to use my Weck jars that I got from Crate and Barrel. It even looks pretty on my open shelf. Enjoy!

Wednesday, April 3, 2013

Golden Gluten Free Fried Chicken

I feel like I've discovered GOLD! It's been months since I've been able to make fried chicken, because I've been gluten free since December. I know it's not healthy, because it's fried, but I eat plates-full of vegetables and have cut out so many foods, that a little oil isn't gonna kill me every once in a while. I didn't think this would ever be possible. Gluten free people know, crunchy breading is something you give up when you can't have gluten. At least, until now! I tried making chicken strips with almond meal a couple of months ago, and they were mushy and NOT good..
This is really simple. You simply follow the same exact steps for my Ultimate Fried Chicken, with the exception of using Trader Joe's Gluten Free All Purpose Flour instead of regular flour. Make sure your seasonings are gluten free as well. I used a seasoning salt, garlic granules, and pepper. It's really simple. The chicken goes straight into the seasoned flour, into egg, then back into the seasoned flour. You MUST do it this way, NOT the egg first. 

Drop into HOT vegetable or canola oil. You must make the oil a few inches deep in a big skillet or else it won't cook right. Make sure to cook thoroughly, depending on the size/cut of your chicken cooking times will change. If you are unsure of a large breast, take a piece out of the pan and slice into it to see if the juice is clear all the way to the bone. Drain on a baking rack, so that the bottom of the chicken doesn't get soggy. 

Eat. Crunch. Enjoy. Crunch. Repeat. You can thank me later!

Thursday, March 28, 2013

Gluten Free Lunches and Secret Weapons

I was recently asked by a friend who was thinking about doing a month long trial of gluten free, WHAT do you eat for lunch?? I admit, eating gluten free leaves me with a lot of dirty dishes. I cook, and cook, and cook some more. I was THRILLED to get a text last week telling me that since she went gluten free a couple of weeks ago, she hasn't had ONE headache! SO exciting!! I thought I would share a few of the things I've been doing for lunch lately. In the beginning I made salads at home, but that got old and boring REAL quick.
 Lately, I've been on a sauteed veggie kick for lunch. It's super fast, and only dirties one pan (none if I grill them!). Experimenting with different combinations is fun and keeps me excited to try new veggies. Up top, I sauteed some broccolini (which was a first for me and I loved it!) in a pan with a bit of olive oil and salt and pepper for a few minutes by itself since it takes longer to cook, then added big chunks of fresh asparagus and sliced mushrooms. I could eat asparagus and mushrooms every day. At the end, I added a bit of butter, and fresh garlic, then melted some shredded Parmesan cheese.
 Here, I used some skinny local asparagus from the farmers' market, mushrooms, zucchini and yellow squash. I used the same method as I did above.
 This picture is the bottom of my bowl today (when it dawned on me to take a picture). I simply cut up tiny Persian cucumbers from Trader Joe's, a ripe tomato, fresh basil, and drizzled a bit of olive oil and balsamic vinegar. I used fresh garlic, pepper, and a bit of Himalayan Pink Salt to season it. I know I need protein, so I ate it with a side of bacon! Ha! Not sure if bacon is in the meat or fat section of the food pyramid, but I've cut out so many bad things, that I don't care! No one is taking away bacon once a week!
This my friends, is a brainstorm gone terribly right. I have never really been an avocado person, weird, I know! For some reason I felt like I might like it if I opened it up, added salt and pepper, then topped it with either feta or cotija cheese, then gave it a simple drizzle of balsamic vinegar. Guess what? I LOVED it! I eat them like this all the time now. 
I have the benefit of being at home most days since we home school. It is nothing for me to flip on the gas grill and cook a fresh piece of salmon and some asparagus. These asparagus are seasoned with a bit of melted butter and Montreal seasoning. 
I don't do it often, but when I make it to Fresno and pick up some Udi's gluten free pizza crusts, it's easy to make a pesto pizza with tomatoes and fresh basil. I've tried the dry pizza crust mixes and I just did NOT like feeling like I was eating a brick. This crust gets crisp and light.
Now we get to the secret weapons I've learned in the past few months. Chipotle salads are what I eat at least once a week (not always at lunchtime though). If you look at their website, you'll see that you're GF ok as long as you don't eat the flour tortillas. That means you can have a salad, burrito bowl, or crunchy tacos and fill them to your heart's content with all their tasty goodness. I am a sucker for their salads though because of their vinaigrette. It is like crack.

For snacking I love to keep baggies of raw almonds and Guittard semisweet chocolate chips. Their chocolate is GF and it is my all-time favorite anyway. Score! 
My last secret weapon is these GF Oatmeal Chocolate Chip Cookies! My entire family goes crazy for them. Heat them up for a few seconds in the microwave if you like to make them soft again after they cool. I add about 3/4 bag of Guittard chocolate chips to her recipe, and instead of grinding my own almonds I just use a cup of Almond Meal from Trader Joe's. It might sound like it's a complicated recipe, but it's not. The second time you make them, you'll have it down pat and have your cookies ready for the oven in five minutes. Trust me, I've made these dozens of times. I bake mine on parchment paper and they just slide right off. I am tempted to mix in a bit of Chia seeds next time and see if the kids notice. These cookies are better than any boxed GF mix you will ever find. Trust me! Just make sure you use gluten free oats.

This last picture is just so you can see what the almond meal looks like. It's super cheap at Trader Joe's. I also picked up that GF flour to use if I need to thicken anything. That opens up a whole new world. My husband saw it and immediately yelled "Gluten free fried chicken!!" Ha ha. I haven't tried it yet, but I may splurge and try it soon to see how it turns out with this flour. Hopefully these ideas help! As always, please check your products and seasonings to ensure your brand is gluten free, don't take my word for it! ;)

Friday, March 8, 2013

Universe Juice

If you read my last post, you know WHY I finally decided to eat gluten free.  My goal is not to lose weight (although that it is happening), but my goal is health. I wanted to cool the fire of inflammation in my body. One of my favorite habits I've begun is starting our day with what my hubby calls Universe Juice. My husband calls me his Pepper Potts, he's my Tony Stark, and we start each day with universe juice. ;) Yes, we're Ironman fans. 
There are a million different ways to make a smoothie, but right now we've been making this same one. I cut up a few bananas, put them in a ziploc, and freeze them overnight. I do that every few days. In the morning I simply break a handful off (I actually take the bag out of the freezer, drink my coffee, THEN break off a handful because it's easier after they spend a few minutes out of the freezer), pour in a cup (I don't measure) of Vanilla Almond Milk, a tablespoon of peanut butter, and then fill it with baby spinach to the top. You can add ice, or not. Tony Stark likes his with ice, I guzzle mine up as is because the frozen bananas make it cold.
 If you google "green smoothie" or look it up on Pinterest, you'll find a million different combinations. In my opinion it tastes like a banana-peanut butter smoothie.

Thursday, November 8, 2012

Ultimate Fried Chicken

Yesterday when I asked my husband what he wanted for dinner he said, "fried chicken". Aw rats!  I mean...great, honey! Fried chicken isn't hard, it's just MESSY and time consuming. Lucky for him, I caught The Help on tv again this weekend. When Minny was teaching Celia Foote how to fry chicken, and she used a big paper bag to bread it- my curiosity was raised. That's one of the messiest parts of fried chicken...the breading! Here we go...
 The store I went to didn't have any chicken with the bone in it, so I bought a whole chicken, and we cut it up into pieces. Who knew it was so easy? Buying the chicken whole is so much cheaper, so I think we'll be doing that from now on for fried chicken.

Cut up your chicken. Get out a paper bag (it kind of weirded me out at first, thinking there could be germs in the bag, but then I remembered that no germ can survive the amount of heat this chicken is going to cook in), dump a few cups of flour in it. I didn't measure, I just went for it. Here's where I have to estimate, because I didn't anticipate blogging about this recipe, but someone asked for it. ;) Shake in however much seasoned salt, garlic granules, and pepper as you'd like. A little tip: add more than you think you'll need because some of it will be left behind in the flour you throw away. I'm thinking it might be 2 Tbsp. each of seasoned salt and garlic, and 1 Tbsp. pepper, but that's just an estimate. Mix the seasonings up with the flour.

Have your oil pre-heating on the stove. You need it hot when the chicken is breaded. It sounds crazy, but it's really important to use a lot of oil. I know, I know, but if  you have it hot enough when you drop the chicken in, it kind of seals the chicken, and you're left with juicy chicken inside when you're done. If you skimp on the oil, you might as well not make fried chicken. It won't cook right. I used two big skillets, and divided a regular size bottle of oil, and a half between them.

Beat 2-3 eggs in a dish.

VERY important! Dip your chicken, a few pieces at a time (don't crowd the bag) in the flour BEFORE you dip them in the egg! Your egg has to have something to stick to or it will fall off of the chicken, and so will your batter. So! Light coating in the flour mixture bag, then into the egg, then back into the bag to pick up a lot of the seasoned flour. Then straight into the hot oil.
 I'd like to tell you a cooking time, but since every piece of chicken is a different size, you need to watch them. Flip them about every 7 minutes or so, and turn down the heat to medium after the initial browning on both sides. The big breast pieces take about 35-45 minutes, depending on their size. Legs and thighs about 25-35 minutes. Wings about 20. If you're not sure, take it out of the pan, and poke through with a fork, if the juice runs clear, it's done.Remember this meat has bones in it, so it takes longer.

Have a tray ready, with a cooling rack on top of it. I like this method better than paper towels because the bottom doesn't get soggy. The oil will drip off and your chicken will be crunchy all around!
Hopefully my directions are easy enough to follow! If you skip steps to save time, your chicken will suffer. I've been making fried chicken since I was a young teenager, and my husband said last night's was BEST I've ever made. He wouldn't stop talking about it. Enjoy!

Monday, November 5, 2012

Parmesan Roasted Asparagus

 This is probably OLD news for most of you, but I'm posting it on the small chance that you were oblivious like me. I had NO idea that roasted asparagus were so delicious! And EASY!
All you do is rinse your asparagus, and trim the hard stalk ends if necessary. Toss 'em on a oven safe pan, drizzle a couple of tablespoons of olive oil on them, and top with salt and pepper. Roast at 400 degrees for 10-17 minutes, depending on the thickness of your spears. Mine were the skinniest I've ever seen, and they took about 10 minutes. Just peek at them so they don't overcook and get mushy and dark. For the last 4-5 minutes top them with shredded Parmesan cheese and put them back in the oven for it to melt.
 Here is a peek at my lunch today! I saved a handful last night, so that I could bake some fresh today.

 I made these for dinner last night with stuffing, and the roasted chicken (below) and I could NOT stop eating them! Even my KIDS asked for more!!! What?!

In case you're wondering the chicken was delicious. I didn't plan on blogging about it, so I neglected to take an "after" picture. It was stuffed with a few big slices of onion, sprigs of rosemary, a couple of celery stalks, and a garlic clove. I put butter under the skin, and on top, with kosher salt and cracked pepper. Bake that baby in an oven bag to seal in the juice and YUM, YUM!

Thursday, June 28, 2012

Bakerella's Yellow Cake

Yesterday my wonderful hubby turned 33! A few months ago, I made Bakerella's yellow cake and fell in love. My husband is crazy isn't big on chocolate, so I made the next best thing! This cake with a classic buttercream frosting SCREAMS wedding cake to me. 

Now, I must admit, there has been one time when I made this cake, and it didn't turn out great. For my 30th birthday I think I over-baked it and dried it out. It was also the hottest April day we'd ever had and it spent the whole day in the fridge and it was super dry and crumbly by party time. Trust me when I say, if you make this cake right, it will be like the old fashioned cake your grandma used to make. It's super easy and only has a few ingredients, just don't over-bake! So yummy!

Monday, April 25, 2011

Bunny Bait {Chocolate Covered Popcorn!}

I saw this idea for Bunny Bait over at the blog Bake at 350. It looked super cute and tasty! I couldn't find the tender white popcorn so I used Orville R. Natural simply salted. It doesn't have butter. Salt and chocolate go hand in hand so I figured that would be ok! I popped two bags of popcorn and threw them into a large bowl. I attempted to dig out any unpopped kernals from the bottom of the bowl. While I removed most, there were still a few lingering. The good news is you are able to see them even after covered with chocolate, so you can pick it off before eating it. I was scared you wouldn't be able to see them and the kids would bite hard on a kernal.

Melt your candy melts in the microwave, 30 seconds at a time and then stir after each turn until melted. Pour over the popcorn as you stir it. I used one full bag of candy melts to two bags of popcorn and one bag of m&ms. Dump in the m&ms and add a good amount of sprinkles. I used a third to half of the jar of sprinkles. Mix it all up well.

Lay it out on wax paper and allow to dry.


I found these little bunny treat bags and filled them to go in the Easter gable boxes I made for all of the kids at the family Easter gathering.


The extra got bagged up in cello bags and taken to the lunch in a basket with the peep pops for people to grab. One of the bags never made it there because my mother in law tasted ours in the jar when she babysat on date night....she loved it, so I gave her a bag. ;) It's super easy and SO yummy! It can easily be changed to match any holiday that you match the m&ms to! I will definetely be making this again!

Monday, April 4, 2011

White Chocolate Raspberry Bundt Cake {Moistest cake EVER!}

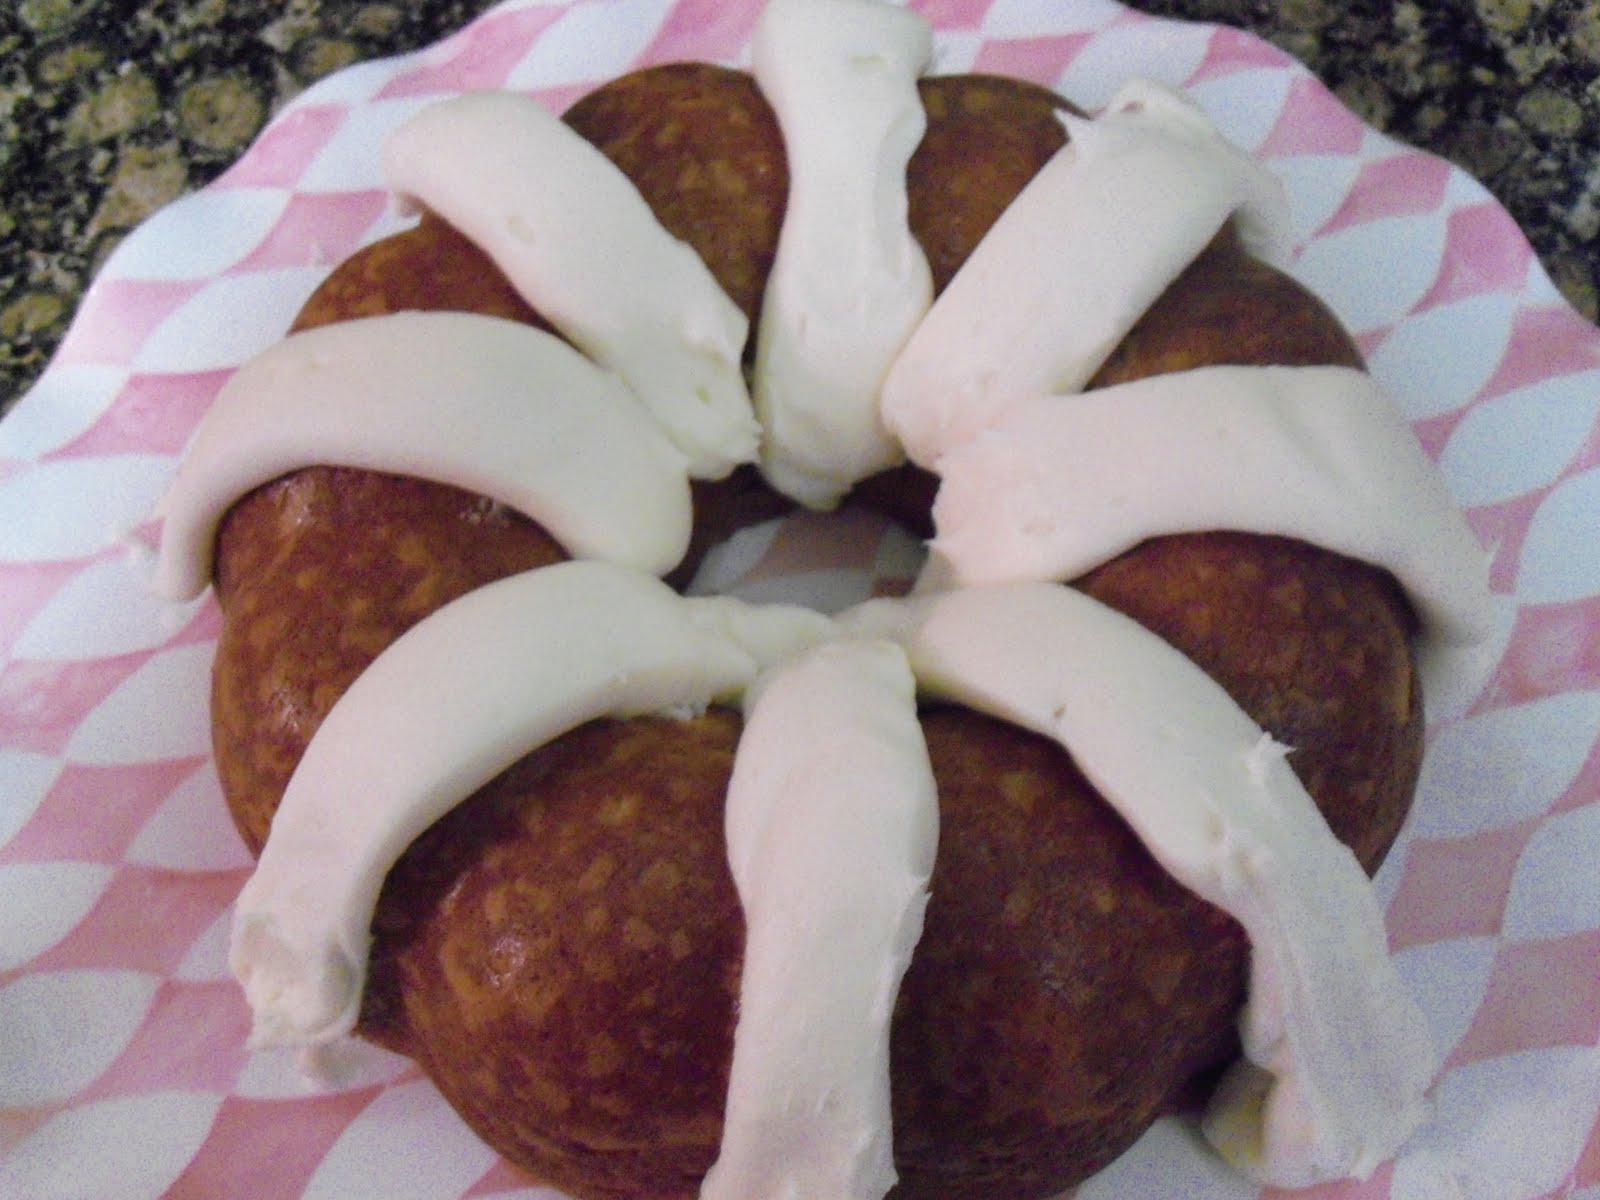
I have been DYING to make this cake again! The first picture is the same cake at my niece's bridal shower last fall. I included this picture because my frosting job didn't look quite so pretty last night {and I didn't quite care, I just wanted to EAT it!}. The recipe can be found here, at Brooke's Recipe Blog. I can tell you one thing: you will NEVER taste a moister cake! It has melted white chocolate chips IN the batter, mashed up raspberries, and a box of vanilla pudding mixed in the batter as well! What it does to this cake is just amazing!Here is a picture of it sliced. So, so yummy!

After I took this picture last night, I added more rows of frosting in between the rows because as I sliced it, not each piece got frosting. I forgot how close the rows were on the last cake, it had been so long! The next time you need a fabulous dessert, make this cake! It will be a hit, I promise! By the way, that's homemade cream cheese frosting!

Monday, February 14, 2011

Lobster Killa

The title of this post comes from Julie and Julia. Julie has dreams that her sleep machine says "lobster killer, lobster killer, lobster killer". When Julie has to make lobster, she puts a whole live lobster in the boiling pot and the lid pops off, she screams and runs out of the kitchen. Her husband runs in and replaces the lid and as he walkes out he whispers "lobster killa, lobster killa...".

Since it's Valentine's Day we decided to splurge and buy lobster tails for dinner instead of going out. Three tails were $27 bucks at Costco...you can keep your "market price" restaurants! As long as you know how to make them, they are great at home!

Do yourself a favor, if they put a bag of ice in with them, take it out as soon as you get home. I forgot and had lobster water leaked (through two bags) all over the shelf in the fridge. Yuck. I put it in two freezer ziplocs after that so that it would contain the juices and smells.

They could not be easier! You split the shells down the back, it helps to plunge the tip of the knife where you see in this picture, where the tail meets the shell, and then push the rest of the knife down. Tap your other fist on the knife if you need to.

After they are like this, you open the shell, pull out the meat while keeping it attached at the very end of the shell. It will sit on top of it's shell. Have a wide pan ready with less than an inch of boiling water in it. Simply put them in the water and put the lid on, leaving it cracked for steam to escape.
I forgot to cut the meat down the back before I put them in the water, so I took another picture. Just gently slice along the back of the meat and it will split open as it cooks.
Sprinkle the tops with paprika. Depending on the size, they take less than 10 minutes to cook. Seriously, as with all seafood don't overcook them or you will ruin them. Start checking them after 5 minutes, look for all white.
While I was curling my hair my hubby put them in a oven safe pan and put them under a hot boiler for 1-2 minutes just to lightly broil the tops. Look how much they shrink up when they cook! it's a good thing they were big to start with!

Serve with drawn butter {melt your butter, separate the solids off, leaving only the clear yellow butter}, and a lemon wedge if you like. I have to say this: be careful about getting carried away seasoning lobster, you can ruin it quickly because you will mask the taste of it. Save all the fancy stuff for something else, don't mess with perfection. I once went to a fancy restaurant and they served their lobster with some sort of dijon mustard sauce on top of it and it was terrible. Keep that in mind before you go reaching in the spice cabinet! ;)