It doesn't get any easier than cut and stick! I used tweezers to place the letters since I used a small, fancy font.


 Cut your pieces, and sand the edges nice and smooth, as well as the front.
 Grab your mod podge! I put a coat on the face and all sides and then let it dry, just to seal the wood.
 Ok, back up. In the tutorial she did this on her computer, but I just grabbed a piece of paper and started working with the names. Once I found one that worked, I counted how many blocks I would need. Put your thinking caps on, you don't need the same number of letters in all of your names because some of those letters will get double-use, but you don't know which ones until you pick your pattern, so do this first. I actually thought it wasn't going to work, or I was going to try to add the word "family" and see if that would make our names work without touching in the wrong places and making the names run together. You could add different words if yours don't work right alone. {family, love, home, your last name, etc.}
 Here are my pieces drying from the mod podge. I didn't take a picture of me placing the vinyl on the blocks, because that's pretty self explanatory. ;) I cut my letters and tiny numbers the correct sizes using my silhouette software. If you don't have vinyl, you could use black paper instead. After placing the vinyl where I wanted it, I put a layer of mod podge on top of them to make sure they stick. Some of them didn't want to stick to the wood very well, because it's the rough edge of the wood. Mod podge did the trick.
 After they dried again, I hot glued flat thumbtacks on the backs of them. Just use one in the center top of the back. I wasn't sure if one would work, but it worked perfectly. ;)
 When hanging, I started with Emma, and grew out from there since hers was kind of the center name.
 Here's a closer shot of the tiny "score" numbers. I think this is SO cute! I LOVE how it turned out!
 I have a niece who is a photographer and she's always posting pics like this one on facebook and I always thought you had to have photoshop to do this, but today she posted one of their dinner while they were at dinner, so I knew there must be an app I didn't know about. I asked her and she said she uses a combination of diptic and instagram. Diptic was $1.99 and instagram was free. I quickly figured it out and {yay!} now I can make cute pictures! Thanks Bree! :)
 I thought it needed something in the middle so I looked for a scrap block of wood in the garage. I sprayed it aqua and cut out Happy Summer with my Silhouette. I used thin wire to loop it through the polka dot ribbon holding the wreath, and finished the ends by swirling them around a pencil.
 I think it looks very summer-y and by the way I LOVE my new font from Silhouette! In case you're wondering it's called SNF Marmalade. Happy Summer! {What's left of it!} :(
 It's kind of hard to tell what's what in the mirror pictures. What's the wall reflection, the banner reflection, the comforter reflection, the fabric backing, the clear spots, the mirror spots.
 I loved this saying and it's perfect for the girls' room: There's no better friend than a sister. :)
 A close up of the fabric backing-found at Hobby Lobby for 30% off. All I had to buy was 1/2 a yard and I still have half of that left over.
 I cut the cardboard backing off and used paint stripper to remove the gray layer covering the backside of the actual mirror layer. Then my handsome hubby did the part with the muriatic acid again. That stuff is lethal. It actually melted the spray bottle he used on the first mirror. This time he used a splatter technique.
 I love it! If I had a boutique I would make the most beautiful frame/fabric/wording combinations and sell them! I am so in love with these!
 I snatched up my little boards, and paid my quarters! :) I took them outside and gave them two coats of Sweet Pea pink.
 I never really liked the way I put the girls' names above their beds when I re-did their rooms. It just didn't look right to me. When I saw these at the store I knew exactly what I was going to use them for! I cut out their names with my Silhouette and I'm DONE! So easy!
 That room has the worst lighting of the whole house, so sorry the pictures are grainy, but you get the idea. I like these SO much better! I think they make it look more "finished" and fancy. Total cost=$0.50!!
 I'm not typing a tutorial because you can check out her directions as well as a link in her post with details on the muriatic acid step.
 I couldn't get my mirror out, so I taped paper on it to cover it up while painting the frame.
 After that I used a piece of fabric from what I already had. I love this teal damask print!
 Last, I cut the vinyl lettering out with my Silhouette. I LOVE it!!
 Amy from the Idea Room said it was one of her favorite projects, and I have to say I agree!
 It's hard to take pictures of a mirror without reflections messing with it, but it looks even better in person.
 I've got my eyes out for a larger, cheap mirror! :) Thanks for the great idea, Amy!
 I moved the bed to the opposite wall it was on and added a headboard.
 There was a set of two shutters at ReStore {two sets hinged together, with four panels total} that would have been perfect! They were tall enough that I could have just stood them up behind the bed. I took them up to the front to see how much they were...$25 each!! Nope! No way I'm spending fifty bucks on a headboard for a kids room! I went back and found two of these shutters. They were the perfect length for the queen bed, if I laid them on their side. They were $15 each. Still more than I wanted to spend, but twenty dollars cheaper than the other ones, and I REALLY wanted shutters! I painted them both with two coats of white paint.
 We've had this pink, 3 bin sorter for years, but the dress up clothes have been camping out on the floor forever! Driving me c-r-a-z-y! I built this addition to it using 2 boards and a dowel rod! I tested it out to make sure it fit before painting it and securing. it.
 I used my Silhouette and vinyl to put their names over their side of the bed and cut out "Royal Princesses". I also moved their old castles so that they can each put their little treasures in the one by their side. Kids always want to sleep with little trinkets that can get lost. Now they have a place to put it.
 I hung the shutters by hammering in a sawtooth picture hanger on each end. First I hung the bottom one, and then hung the top one so that it's sitting on top of the bottom one perfectly. The slats on the shutters are opposites, because if I put them the same way there is a difference in the width of the top board and the bottom board.
 This dollhouse has been on the floor since we bought it at a thrift store over a year ago. It had hangers on it, but I never bothered to hang it. Today I hung it above the little kids table and chair.
 I moved the castle hanging basket to an area where I had room for it. The book sling has been there for awhile. I hung up some pictures that have been laying around and that the girls love.
 I finished the dress up closet this morning. I gave it two coats of pink spray paint.
 I had some brackets in our "junk basket" of odds and ends and they worked perfectly. I also used wood glue to give it some extra strength.
 I kept the curtains the same because I love them. These were made by my sister in law for my niece when she was a teenager still living at home. Now she's married and gone so the curtains got passed down to us. The lighting in this room is horrible but it's a shimmery periwinkle fabric.
 It has beads hanging down from the trim.
 I made a pennant for the shutters to tie in with the big ones stretching across the room. I love it so far! We're going to go tomorrow to look for a long mirror at a thrift store to go by the dress up area. I would also love to change the regular old light fixture to one of those chandeliers with the clear crystals hanging down. I think that would be perfect for a princess room!
  Start out with a cabinet door. This one was dark {not pretty, think ugly 70's style finish} wood and I bought it for 2 or 3 dollars at ReStore. They have a big pile of cabinet doors. The only thing is a lot of doors are not symmetrical and they would look funny as a tray. Do you know what I mean? They have a scalloped design on the what would be the top part of the cabinet if you were looking at it vertically, the way it's meant to be.
 I also found two matching handles for fifty cents each at ReStore. They have a few little bins full of knobs and pulls to dig through.
 I liked these black, hammered ones.
 Simply screw in your handles on each side. Mine also had a hole in the center where I had to remove an existing knob when I bought it.
 I used my Silhouette to cut out some black vinyl, which covers the hole and jazzes it up. :) I can change the vinyl easily to fit different occasions/parties. Total cost= about $4!
  I used my Silhouette software to use this image and replicate it across the page. I had read on a couple of blogs that you could buy your own stencil plastic and cut it. Then you have a reusable, nice plastic stencil of your own! It was 5 sheets for $4.99 at Hobby Lobby in the Art section. I already had this paint from a different project. I love this aqua/turquoise color with dark wood! I painted the whole top with the stencil, just moving it as needed and lining it up with the one I just painted. I used a small roller to apply the paint.
  These few pictures show you how bright the paint was. I wanted to "shabby" it up a bit...

 I used a sanding block to sand off some of the paint to lighten it and let some of the dark stain come through.

 I found this drawer pull at Hobby Lobby for $4.99 and it was 50% off! I even used rusty screws so that they would match. I love that you can buy knobs that already look old!
  Here are several pictures of the finished product! It is my new entryway table, by the font door.
 I was in Ohio when the craft group I belong to made these "favorite things" blocks, but they saved me a kit and I made it yesterday. It turned out pretty cute!
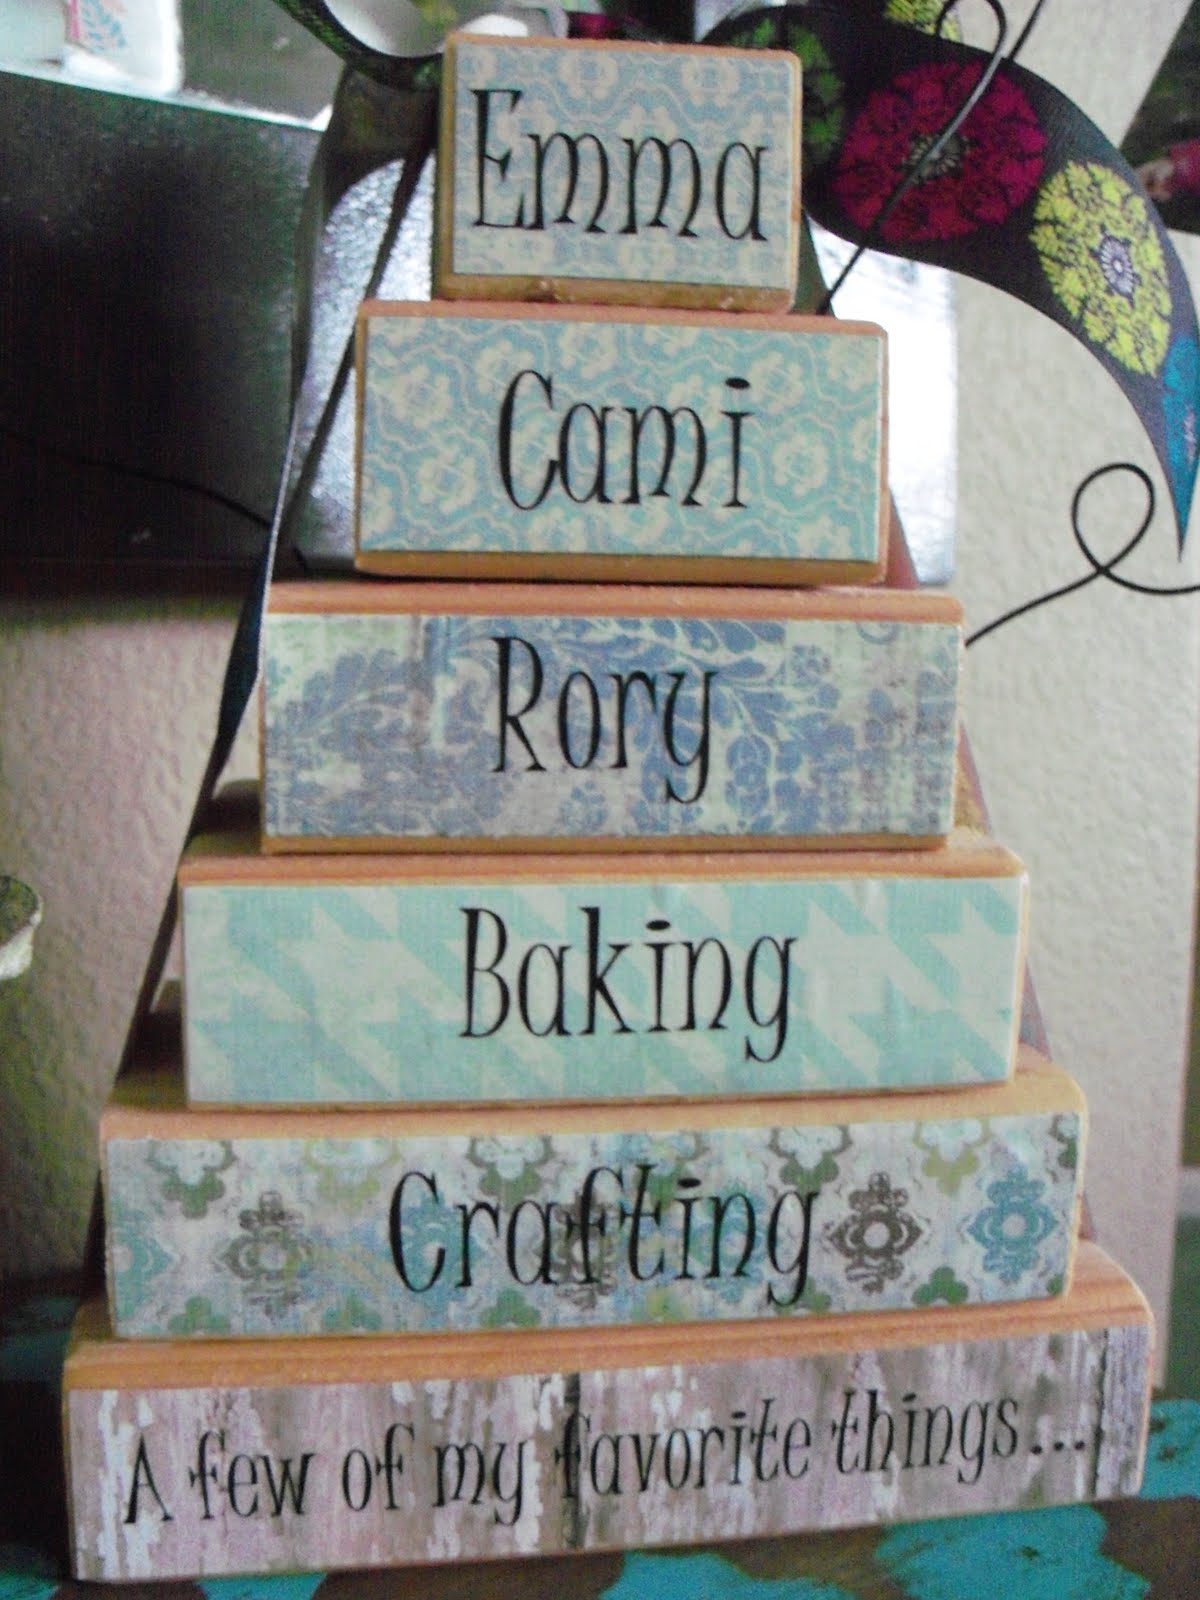
 I LOVE this rustic wire bird basket that I got from a friend for my birthday! It's from Home Goods, and it even came with a matching larger basket! A great spot for outgoing mail so I don't forget it! The other two ceramic items are from Home Goods, they were in the bathroom section, but I'm using them as a phone/keys tray and pen/scissors holder! I love the way it turned out! Total cost: $6 Table, $2.50 Knob= $8.50 for a new table!!
 Linking up to All Things Inspired Party at All Things Heart and Home.