Check out where I got the idea for this ruffle runner here. I hate showing that I made something for my home that someone else sells, but I can't bring myself to pay for something I can make for about 5 bucks. And it's for my own house, it's not like I'm making them to sell. SO....at least if you like the idea but are not a sewer, you could order from the original over at The Shabby Chic Cottage.
 I started off by cutting my berlap the size I wanted it. Then cut your muslin (get the cheapest one!). I bought two yards of berlap, and 2 yards of muslin. I then cut two strips of the muslin at the same time because I knew since I would be ruffling it, I would need more than two yards. You could sew them together on the back side before starting if you want, that would have been easier than the way I did it.
 I sewed the top edge a couple of inches back from the berlap edge. I love that the whole thing is raw edges! As I sewed down the length of the runner, I would fold over the muslin to create ruffles.
 EACH time I sewed a fold on the right side, I would put the needle down in the fabric on the machine, and pull both fabrics taut. Then I would kind of match the other side with a matching fold and pin it in place.
 Since I didn't stitch my two strips of muslin together before starting, I simply folded the end of the first strip and tucked the beginning of the next strip under and kept sewing.
 Even though I cut the muslin pieces at the same time, I guess there was a difference in the way the fabric was folded in half on the bolt and so I had to trim a tiny bit off the right side to make it even.
 When you get to the other end, stitch it on leaving a couple of inches from the berlap edge, as was the other end.
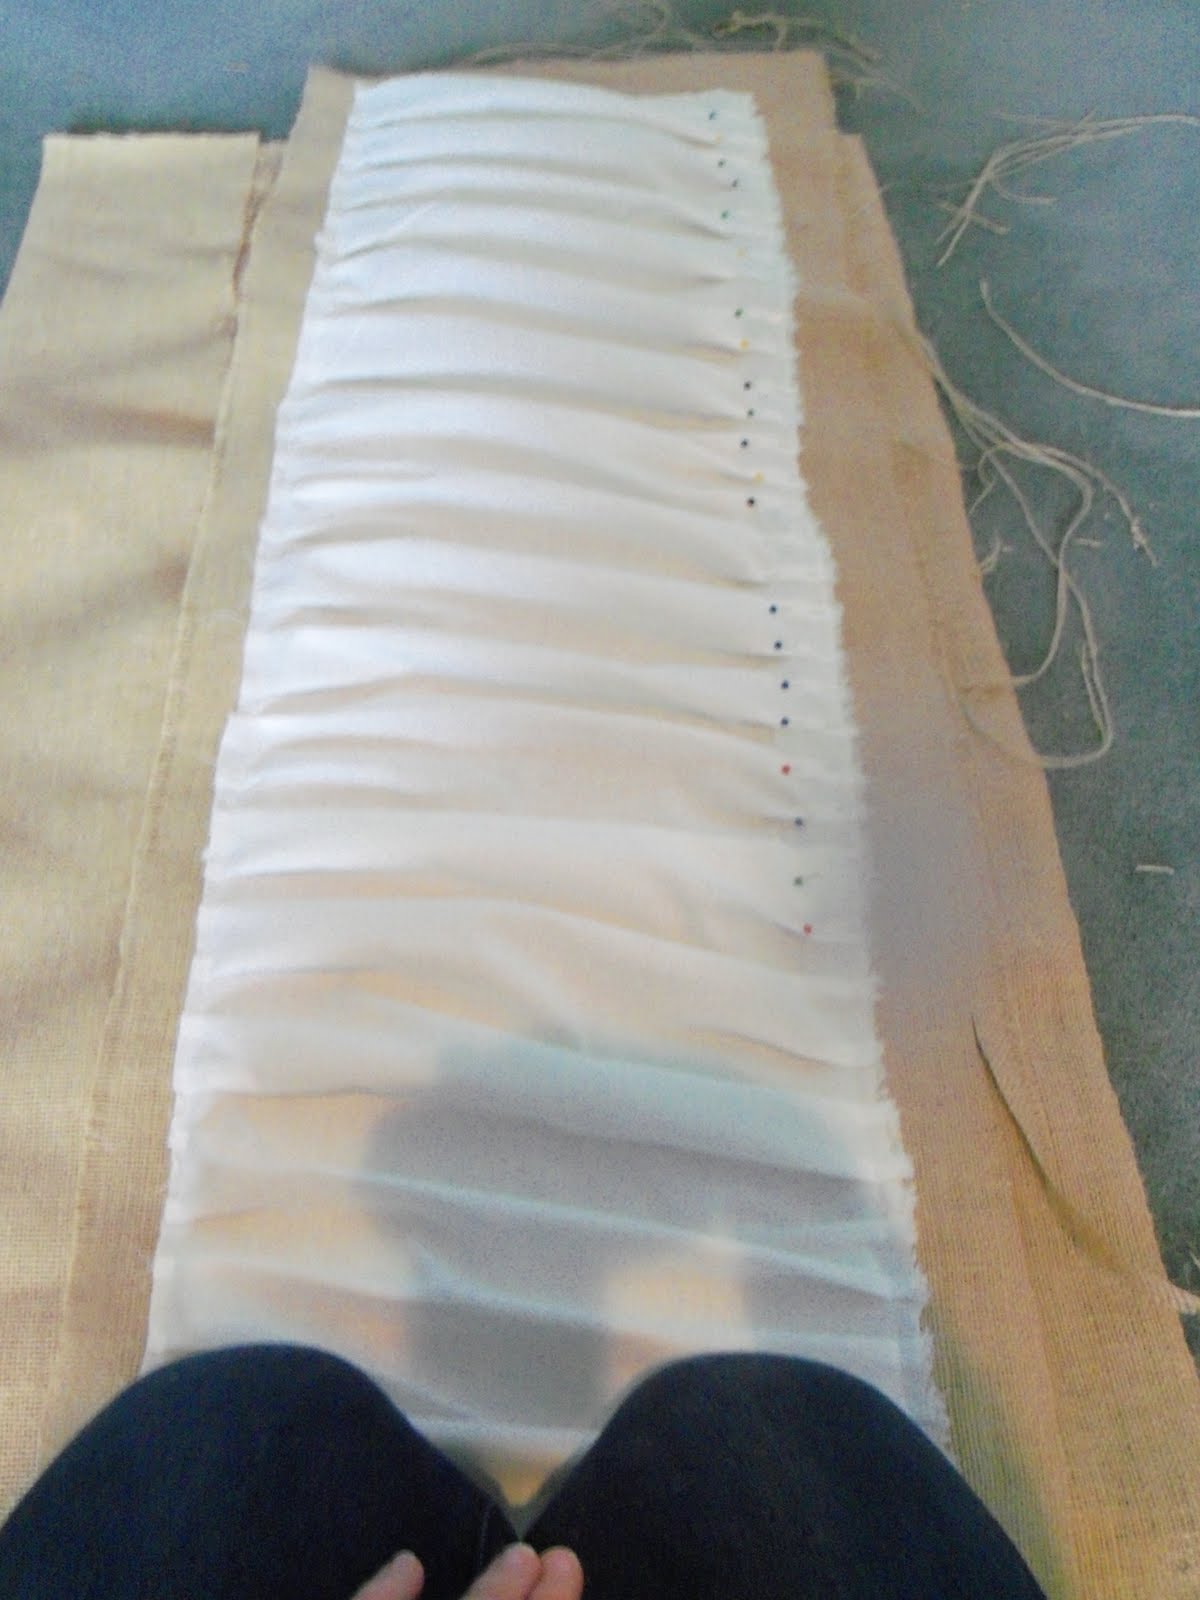 When I was done I removed the pins, and trimmed the edges of the berlap that needed evened out.Then I simply pulled a couple of threads out of the edges of the berlap to give it that frayed look.


 I think I'm going to make a matching pillow for an extra chair that I have off to the side in the dining room.
 It's going to look super cute with my spring bird tree when my bird order arrives! Click on the link to see the birds!
No comments:
Post a Comment